
Table of Contents
- Why Firebase?
- Setting Up Firebase in Your FlutterFlow Project
- Activating Authentication in Firebase
- How to Create Firebase Cloud Storage
- Generating Configuration Files
- Configuring Firestore Rules
- Creating the Users Collection and Enable Authentication
- Implementing Signup and Login in FlutterFlow
- Conclusion
This blog will guide you on how to set up Firebase & Authentication in a FlutterFlow app, covering the process of connecting Firebase to your project, enabling email authentication, configuring Cloud Storage, deploying Firestore rules, and creating a user’s collection. Finally, we’ll implement signup and login pages in FlutterFlow to turn this setup into a functional app.
Why Firebase?
The Firebase ecosystem takes care of the backend part of your applications: user authentication, database, file storage, and all else. With FlutterFlow, this becomes even easier since you do not have to set up custom backend infrastructure. This is what we shall do in this blog:
- Enable Email/Password Authentication.
- Set up Firebase Cloud Storage.
- Deploy secure Firestore rules.
- Create a user’s collection.
- Build and connect signup and login functionalities in FlutterFlow.
Setting Up Firebase in Your FlutterFlow Project
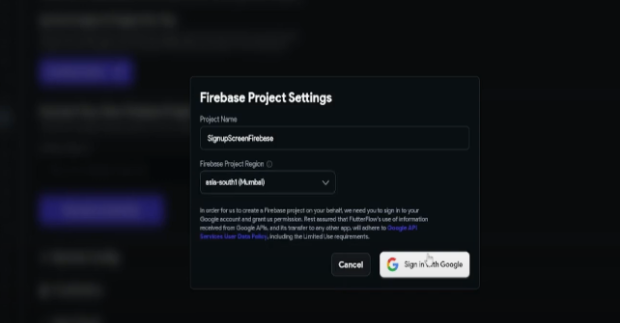
Creating a Firebase Project
To get started, navigate to the Firebase section in your FlutterFlow project settings:
- Open FlutterFlow Settings : In the left panel of FlutterFlow, select the Firebase option under the “Project Setup” menu.
- Project Name and Region : You may want to include the name of the project followed by a region in a case like “SignupScreenFirebase”- signup if you select the Firebase site region for your project.
- Sign In using Google : Linking to your Google account will create the Firebase project automatically.
Activating Authentication in Firebase
Setting Up Email/Password Sign-In
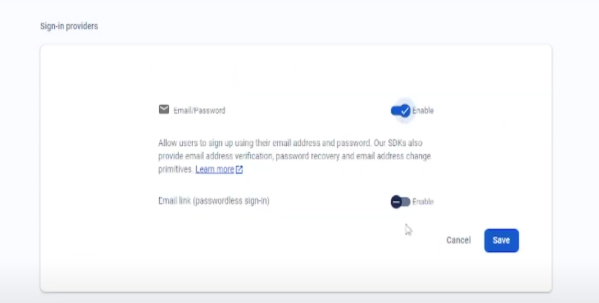
Authentication enables the user to log in securely by assigning a method of authentication to the account. The activating of Email/Password authentication provider is as follows:
- Navigate to Firebase Console – Open the Firebase console and go to the Authentication section.
- Methods of Sign-In – Under the “Sign-In Methods” tab, enable the Email/Password option.
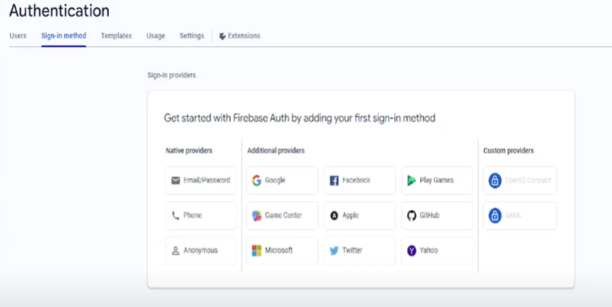
- Save Changes – After enabled, click Save.
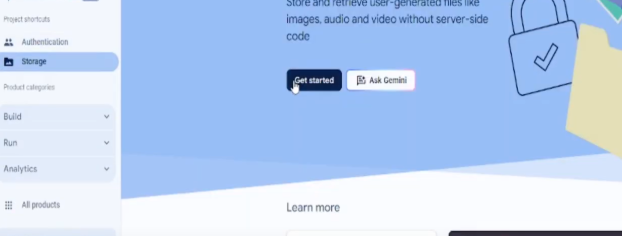
How to Create Firebase Cloud Storage
Upload and house files created by users: images, documents, videos, etc., with Firebase Cloud Storage.
- Navigate to Storage in Firebase Console – Open the Storage section in Firebase.
- Deploy Storage Rules – Update the storage rules to ensure secure data handling in production environments.
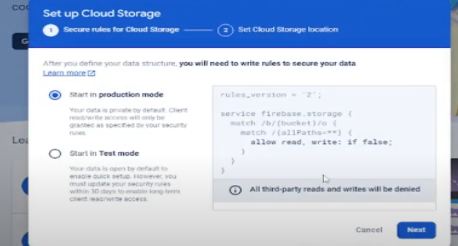
Example of test rules
These rules will be adjusted later for added security.
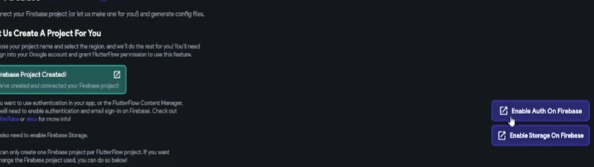
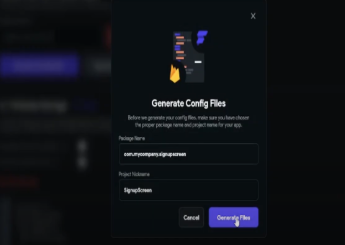
Generating Configuration Files
Once the project is created, click on the Generate Config Files button in FlutterFlow. This step links Firebase to your FlutterFlow project. Ensure the configuration files are deployed correctly to avoid integration issues.
Configuring Firestore Rules
- Deploy the Rules – Click on Deploy to apply these rules.
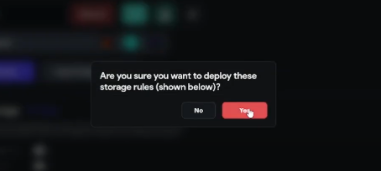
These rules ensure that only authenticated users can access the user’s collection.
Creating the Users Collection and Enable Authentication
The user’s collection stores details about registered users, such as their names, email addresses, and other relevant information.
Setting Up the Collection
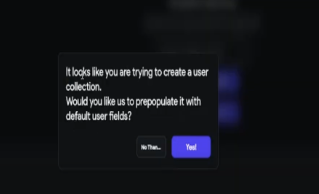
- Create a New Collection – In Firestore, create a collection named users. It will automatically create the fields for user’s table.
Enable Authentication
- Create a New Collection – Navigate to settings and enable Firebase Authentication in Flutterflow and then select the entry page and logged in page.

Implementing Signup and Login in FlutterFlow
Configuring Signup
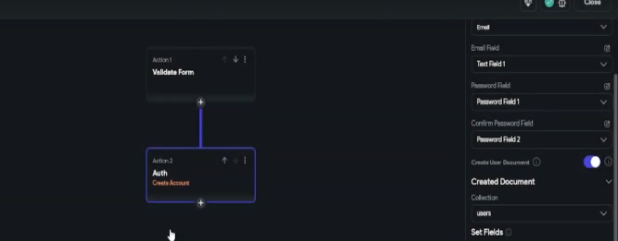
- On Click – Add an Action to the “Sign Up” button.
- Firebase Authentication – Select the Firebase Authentication action and choose the Create Account option and turn on navigate automatically.
- Firestore Write – After successful signup, add an action to write user details to the Firestore users collection.
Configuring Login Action
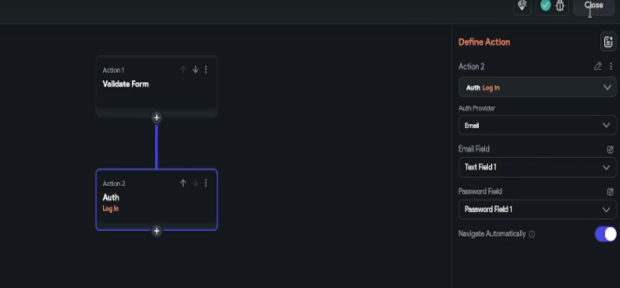
- On Button Click – Add an Action to the “Login” button.
- Firebase Authentication – Select the Sign In option under Firebase Authentication actions and turn on navigate automatically.
Logged in Page
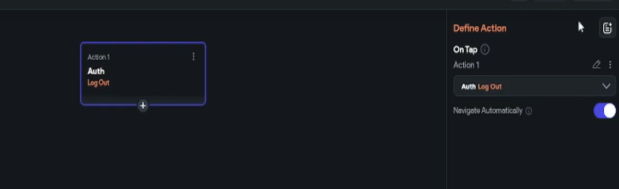
- Logout – Add an action to Logout from the session.
- Email Label – Add a label text widget to show the authenticated user’s email.

Conclusion
Firebase will now perfectly complement FlutterFlow for very basic app requirements such as authentication, storage, and database management. You will find instructions for the easy integration of Firebase into your FlutterFlow project, configuring the necessary features, and building fully functional signup and login pages, all in this guide.
This ensures simplified backend integration, as well as the ability to scale the application and secure it, should you ever need to build small or very large applications with Firebase and FlutterFlow working together to handle the complexity. By following this guide on how to set up Firebase & Authentication in a FlutterFlow app, you now have the tools to implement signup and login pages and turn this setup into a fully functional app.