
Table of Contents
- First step is to Create the Blank Project
- Second step is to Design the Signup Screen
- Layout Planning
- Background Image
- Form Design
- Create Account Button
- Typography
- Third step is to use different widgets
- Column Widget
- TextField Widget
- Button Widget
- AppBar Widget
- IconButton Widget
- Fourth step is to add Navigation to a New Page
- Setting Up the New Page
- Adding Navigation Action
- Fifth step is to Test the App
- Conclusion
In this blog, we are going to see how to create First Flutterflow Application from scratch. We will begin by creating the project, followed by styling a signup screen. Additionally, we will explore widgets and extend the app with simple page routing, while, for now, skipping authentication. Therefore, let’s dive into the steps, discuss the challenges encountered, and reflect on the lessons learned throughout what proved to be a remarkably enriching experience.
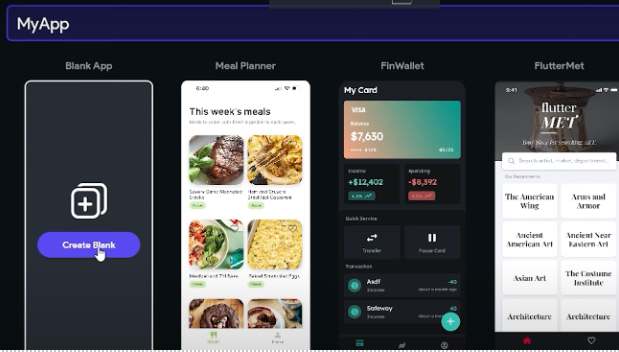
First step is to Create the Blank Project
The first thing for creating first application in flutter flow is to set up the project. Here’s where I made a conscious decision to turn off Firebase integration, which, while FlutterFlow generally promotes integration for authentication, database etc., I opted here not to integrate as wanted to just focus on the design and writing navigation without worrying about installing and integrating everything on the back end.
Then, started with a Blank App project and ensured that I was starting off with a clean slate, ready to customise. I easily was able to disable Firebase at this point since FlutterFlow allows me to skip the integration during the project setup.
Second step is to Design the Signup Screen
Layout Planning
The signup screen is the first thing users see, so it needs to make a lasting impression. My design goals were:
- User-Friendly Interface: A simple layout with clear input fields and an action button.
- Visual Appeal: A captivating background image to make the app visually engaging.
- Responsiveness: Ensuring the design adapts well to various screen sizes.
Background Image
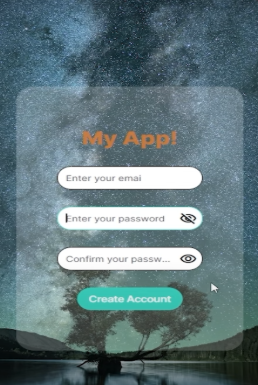
I chose a beautiful starry night background. The background gives users a positive first impression. The background image was applied using the Container widget, set to cover the entire screen.

Form Design
So, to allow users to create an account, I added the following input fields:
- Email Field: To capture the user’s email address.
- Password Field: To create a secure password.
- Confirm Password Field: To ensure the user re-enters the password correctly.
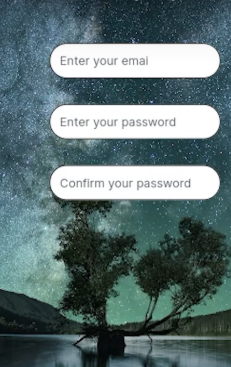
Each of these was created using TextField widgets. I customised the placeholder text to guide users, like “Enter your email” and “Enter your password.” The text fields were styled with rounded corners, a clean white background, and a slight shadow to make them stand out against the starry night background.
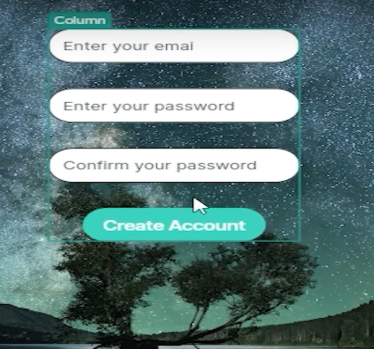
Create Account Button
The final touch was the Create Account button, which serves as the call-to-action (CTA). I designed it to be visually distinct by:
- Using a bright teal color for the button.
- Adding round corners for a modern look.
- Place it below the form fields with appropriate padding.
Typography
To complete the design, I added a Text widget at the top with the title “My App!”. The font style was bold and orange, ensuring it was readable and contrasted well with the background.
Third step is to use different widgets
FlutterFlow’s widget system is a powerful tool for creating apps, and this project gave me a chance to explore some of its most essential widgets:
Column Widget
I used a Column widget as the parent layout to stack all elements vertically. It helped align the background, form fields, and button in a clean and organised manner.
TextField Widget
This widget was crucial for creating the form fields. I explored properties like:
- Hint Text: To guide users on what to input.
- Input Type: Email and password types were selected for relevant fields.
- Obscure Text: Enabled for password fields to hide user input for security.
Button Widget
The button widget was easy to customise with properties for background color, text color, corner radius, and shadow. Actions could also be added directly to it, making it functional.
AppBar Widget
I included an AppBar widget on the second page to maintain consistency across screens and provide navigation controls. It helped make the app look professional and user-friendly.
IconButton Widget
This widget was used for the navigation button on the AppBar. It provided a simple and intuitive way to go back to the previous screen.
Fourth step is to add Navigation to a New Page
With the signup screen ready, the next step was to add navigation. The goal was to allow users to click the “Create Account” button and navigate to a new page without implementing authentication.
Setting Up the New Page
I created a new page in the project and named it New Page. The new page design was kept minimal, with a header at the top reading “New Page” and placeholder text in the center saying, “Drag widgets into the column.”
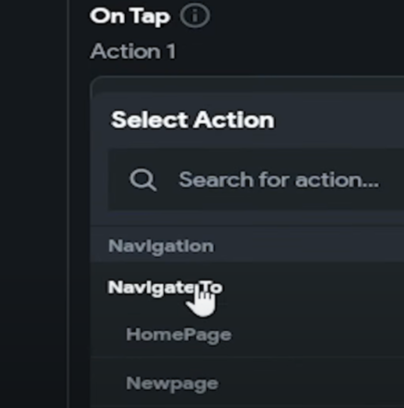
Adding Navigation Action
To enable navigation, I added an Action to the “Create Account” button on the signup screen:
- The action type was set to Navigate to Another Page.
- I selected the New Page as the destination.
- This action ensures that when the button is clicked, users are seamlessly redirected to the new page.
This step was straightforward and required no coding, making it an excellent feature for prototyping.
Fifth step is to Test the App
Tested the app on test mode. Here’s what I checked during testing:
- Navigation: Clicking the “Create Account” button successfully redirected me to the new page.
The testing process validated the app’s basic functionality and confirmed that the design worked as required.
Conclusion
Creating this first application in FlutterFlow was a rewarding experience that taught me the basics of UI design, widget exploration, and navigation in FlutterFlow. Maintaining a focus on the frontend allowed me to develop the prototype to full functioning operational capabilities with a maskable UI.
This project has localised the stage for accessing more complex app development in the future. For those of you getting started on your FlutterFlow journey, I trust this guide will help you to play around and build something cool.